
Installing a mortise lock involves marking the door, mortising a pocket for the lock body, drilling for the cylinder and handles, and securing the lock case, strike plate, and trim. With the right tools and careful measurements, most installers can complete a mortise lock installation in under an hour. This guide walks through each stage of the process — including how to confirm door handing before you start — so you can achieve a secure, properly aligned fit on commercial or residential doors.
Mortise locks are favored in commercial and high-traffic residential settings because they're more durable than cylindrical locksets and offer a wider range of function options — from simple latch mechanisms to fire-rated, ANSI/BHMA A156.13-compliant models. Because the installation requires cutting a mortise pocket directly into the door edge, precision matters more than with a standard bored lock.
What Tools Do You Need to Install a Mortise Lock?
To complete a mortise lock installation, you'll need a mortise lock template (usually included with the lock), a drill with spade or hole saw bits, a chisel and mallet, a router (optional, for cleaner pockets), a tape measure, a marking gauge or pencil, and a screwdriver. Having the correct template for your specific lock model is essential, since mortise lock dimensions vary by manufacturer and lock series.
· Mortise lock body, cylinder, and trim (handles/levers)
· Paper or metal installation template
· Power drill with appropriate spade/hole saw bits
· Wood chisel and mallet
· Router with mortise attachment (optional but recommended for clean pockets)
· Tape measure and marking gauge
· Screwdriver set
How Do You Confirm Door Handing Before Installing a Mortise Lock?
Door handing refers to which direction a door swings and which side the hinges sit on, and it determines which way the lock's latch bevel and cylinder must face. Standing on the outside of the door (the side facing away from you when it opens), a left-hand door has hinges on your left, while a right-hand door has hinges on your right; reverse-handed doors swing outward instead of in. Confirming handing before you order or install a mortise lock prevents a mismatched latch bevel, which is one of the most common reasons installers need to change door handing for a mortise lock after the fact.
How Do You Prepare the Door for a Mortise Lock?
Preparation starts with positioning the manufacturer's template on the door edge at the correct backset and height, then marking all cutout points before any cutting begins. Most mortise locks are installed at a standard height of 40 inches from the floor to the centerline, though this can vary based on local code or building specifications.
1. Tape the paper template to the door edge, aligning it with your marked centerline.
2. Mark the outline of the lock body mortise pocket, plus the centers for the cylinder hole and spindle hole.
3. Double-check backset measurements against your lock's specifications before cutting — backset errors are one of the most common mortise lock fitting mistakes.
How Do You Cut the Mortise Pocket?
The mortise pocket is cut into the door edge using a drill to remove the bulk of the material, followed by a chisel to square off the edges to match the lock body's exact dimensions. Depth and squareness are critical here, since a poorly cut pocket can cause the lock to sit at an angle or fail to latch properly.
1. Drill a series of overlapping holes along the marked outline to rough out the pocket.
2. Use a chisel to clean up the sides and square the corners, checking fit against the lock body frequently.
3. Test-fit the lock body in the pocket — it should sit flush with the door edge without forcing.
How Do You Drill for the Cylinder and Handle Spindle?
After the mortise pocket is cut, drill through the face of the door for the cylinder hole and the spindle hole, using the template to keep both perfectly aligned with the lock body's internal mechanism. Misalignment at this stage is a leading cause of sticky or non-functioning handles after installation.
1. Drill the cylinder hole through both faces of the door, working from each side to prevent splintering.
2. Drill the spindle hole for the handle or lever mechanism, again working from both faces.
3. Insert the lock body and confirm the cylinder and spindle pass through smoothly before securing anything permanently.
How Do You Install the Lock Body and Trim?
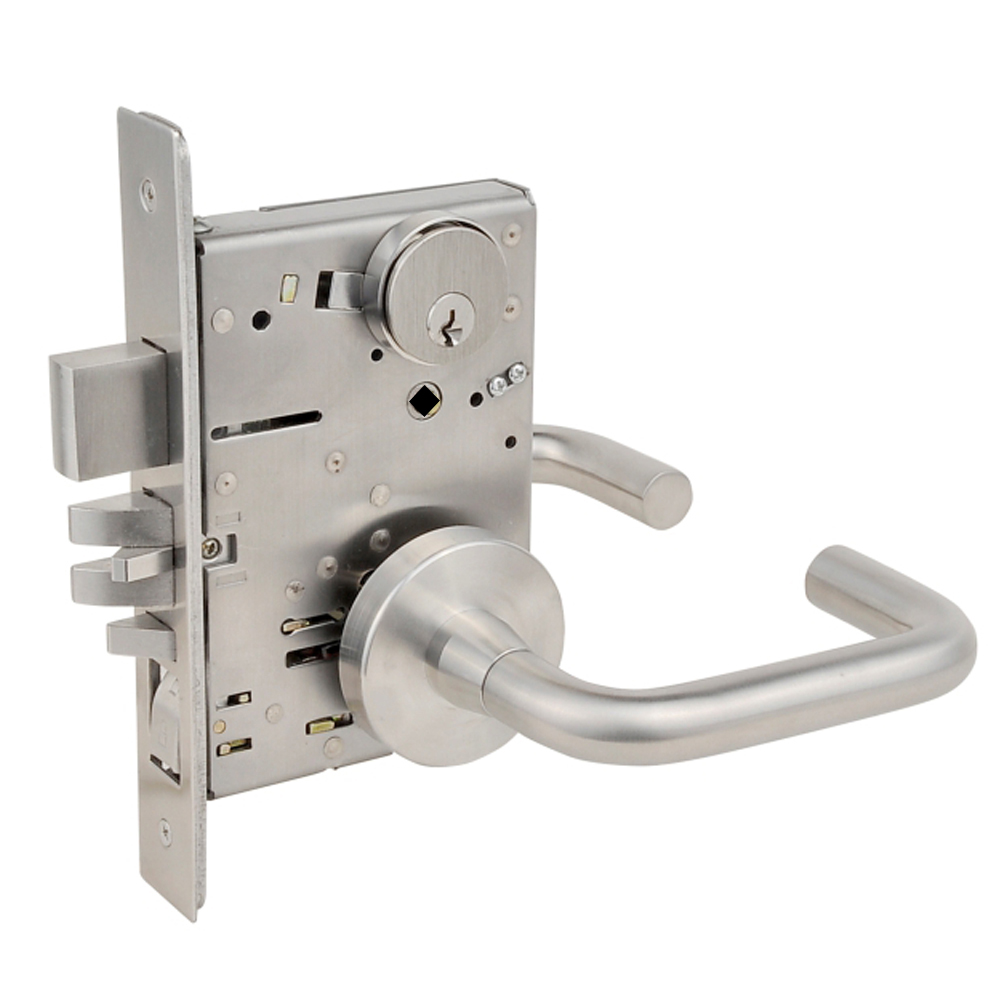
Once the pockets and holes are cut, slide the lock body into the mortise pocket, secure it with the mounting screws, then attach the cylinder, spindle, and exterior/interior trim according to the manufacturer's instructions. Fire-rated commercial mortise locks, such as those built to ANSI/UL 10C or CAN/ULC-S104 standards, often include additional fire pins or heat-activated components that must be installed exactly per spec to preserve the fire rating.
1. Insert the lock body into the pocket and secure with the face screws.
2. Install the cylinder from the exterior face and the spindle through the lock body.
3. Attach interior and exterior trim (levers or knobs), tightening evenly on both sides.
4. Install the strike plate on the door frame, aligning it with the latch and deadbolt for smooth operation.
What Are Common Mistakes When Installing a Mortise Lock?
The most common mortise lock installation mistakes include misreading the backset measurement, cutting an undersized or crooked mortise pocket, and misaligning the strike plate with the latch. These errors typically result in a lock that doesn't close smoothly, a door that doesn't sit flush, or hardware that wears out prematurely.
How Do You Troubleshoot a Mortise Lock After Installation?
If a newly installed mortise lock doesn't latch, sticks, or feels misaligned, the issue is usually traceable to strike plate alignment, spindle depth, or a mortise pocket that's slightly too tight or loose. Testing the lock through several open-and-close cycles before finalizing installation can catch most of these issues early.
FAQs
How long does it take to install a mortise lock?
Most experienced installers can complete a mortise lock installation in 45 minutes to an hour, though first-time installations often take longer due to careful measuring and test-fitting.
Can a mortise lock be installed on an existing door without a mortise pocket?
Yes, but it requires cutting a new mortise pocket and drilling new holes, which is more labor-intensive than replacing an existing mortise lock of the same size.
Do mortise locks require a specific door thickness?
Most commercial mortise locks are designed for standard door thicknesses of 1-3/4 inches, though some manufacturers offer trim and lock bodies rated for thicker or thinner doors — check the product specifications, such as those listed on our ANSI Grade 1 Mortise Lock page, before purchasing.
What's the difference between a mortise lock and a cylindrical lockset?
A mortise lock sits inside a pocket cut into the door edge and typically offers greater durability and security, while a cylindrical lockset is installed through bored holes and is generally easier and faster to install.
Can you change the door handing on a mortise lock without replacing the whole unit?
On many mortise lock bodies, you can change door handing for the mortise lock by removing the latch bolt, flipping it, and repositioning the beveled face — no need to replace the entire lock body. However, some lock series are non-reversible by design, so check the manufacturer's spec sheet before assuming a field reversal is possible.
What is the standard backset for a mortise lock?
Most commercial mortise locks use a 2-3/4 inch backset, measured from the edge of the door to the center of the cylinder or spindle hole, though some residential and international models use a different standard — always confirm against your specific lock's template before drilling.


KEYMAN is Your Choice Of Security!
If you have any questions regarding our products or services, please leave your details and our team will respond to you.
: +86-13823964887
: +86-13823964887


